Friday, August 30, 2013

Pop-Up Cards

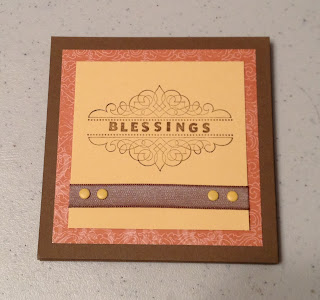
Got back into the craft room after several days AWOL.  I wanted to play with a pop-up card design.  I made one several weeks ago when Sydnie spent the day.   This is the card I made that day.


Lots of stars in Pink Pirouette, So Saffron and Real Red.  Sydnie picked the colors and I like them together.
 

And when you open it, even more stars.  The strips of window sheet make the stars look like they are floating.
 
My first card tonight used the Blast Off set.  I stamped the space ship in Encore Silver and the flames in Encore Gold.  The colors on the card are Rich Razzleberry, Midnight Muse, and Crushed Curry.
 
Open the card and the planets, stars and alien pop up in the center.   Out of this world!
 
My second design - something feminine.  The designer series paper is Gingham Garden.  Colors are Daffodil Delight, Melon Mambo and Pear Pizzazz.
 
And inside - butterflies flit up inside the card.  The butterfly stamps are from Papillon Potpourri.  I used a dauber and added some Melon Mambo and Daffodil Delight ink to white card stock then stamped the butterfly image in StazOn black over the inked area. 
 
And another one - this one has balloons made with the small oval and the foot from the owl punch.  The sentiment is from Perfectly Penned.  I sponged ink onto the stamp by putting Melon Mambo on first in the center area of the stamp.  Then sponged Bermuda Bay on one end and Old Olive on the other end.  You just have to make sure the colors overlap - so start with the lighter color and work up to the darkest.  I also had to reink a couple of the stamp pads to get enough color from the sponging. 
 
And when you open it -
balloons pop out.   I took some white baker's twine and put it between two balloons on the end of the window sheet strip.  I put a very small amount of Tombow liquid glue along the window sheet to hold the twine in place. 
 
And just have to share a baby photo -
 
This was taken by a family member last week.  Don't you just want to squeeze her :-)  What a sweetie - (not biased at all) 

Wednesday, August 28, 2013

Stay-cation

Last week I took a staycation - sort of.  We had out of town guests and a family get-together on Saturday so I decided to take some time off and we did some tourist things in the area.
 
On Wednesday we went shopping - antiques, crafts, etc.  My 'find' was a patchwork design called "Twister".   I couldn't wait to try it with Designer Series Paper -


It is a simple technique once you know the trick.  I'll probably be posting a tutorial soon.   We saw some lovely quilts and wall hangings using this little design.

On Thursday we visited Aunt Faye.  She suffers from some memory loss but she always can make us laugh. She has such a great sense of humor.  Then we introduced some of the family to the granddaughter - what fun!

On Friday, we sent to the Missouri Botanical Gardens and had a personal tour by our niece who works in the children's section.  It is a beautiful place. 

This cutie and her mama joined us.  We had a great time.  For lunch we met a high school classmate of my sister's at Square One Brewery and then stopped in to admire some glass art work at a nearby shop. 

Saturday was the Phamily Phish Phry on Phred's Pharm :-)   It was hot but the young ones enjoyed the pool.  The horses even went swimming.

Sunday - after everyone was gone, I played with my new toy - the Circle Card die. 

It makes a cute and easy flip card.   I used Gingham Garden DSP.  The stamp set is Petite Pairs.    This is the front when the card is folded.


And when you open it, the flip side.  Such a fun card and so easy with the die. 

Monday, August 19, 2013

Paper Pumpkin is here!

Stampin Up has a new 'product' called Paper Pumpkin.  It is sort of a kit of the month club.  And if you sign up before Aug 31, you get 2 months at a 50% discount!   So I couldn't resist.  I got my introductory kit today.

 The Paper Pumpkin is like a 'magical' box - full of everything you need to complete the project.  It arrives in a cute little orange box.  It is a monthly 'escape' from reality.

 Inside the contents are neatly wrapped in tissue paper (which of course I will keep to use on other projects :-)   ) 
Included in the introductory kit was a small Basic Gray stamp pad and an acrylic block which will be used in future kits as well. Also a couple clear mount stamps, buttons, card bases (pre-scored and there are special card stock that is Basic Gray on one side and Whisper White on the other), pre-cut DSP to decorate the card front and a sheet of pre-cut punch out designs to use on the cards. Oh, and envelopes of course! There are supplies for making 4 cards and you can use the stamp set and ink to make other projects of course.
You can make them just like the design or make you own designs to customize them. What a great way to have some quick cards on hand. If you don't need a particular card right now, just make up the designs but don't stamp the sentiment - then when you need a birthday card, just stamp the sentiment. Or just use it as a blank note card.

 This is the card design included in the kit.  Very quick but cute.  The precut shapes have adhesive backing so just peel off the sheet and place on the card.   All I needed to supply was some adhesive for the yellow polka dot background and the button.

 These are the 4 cards I made.  It took me less than 10 minutes to assemble them all.  What a deal!
 
If you would like to join in the fun- just sign up today on the Stampin Up website - Paper Pumpkin
And if you sign up before Aug 31, enter the code PUMPKINDEAL and get two months at the discounted price of $10.00 (plus tax).  Be sure to enter me as your demonstrator - Mary Cavalier. 
 

Sunday, August 18, 2013

A quick Saturday craft

Every day is better with a little crafting.  Saturday I got in a variety of things    First when we took Adelyn home, Tom helped them get the mobile hung over the crib.

He had given them a hook to screw into the ceiling but they couldn't get it to work.  Tom checked it out and after playing with it and not having much luck he realized the piece that should be opened and catching inside the ceiling was on the screw backwards.  :-)  So now it is securely hung over the crib and Adelyn wil have something to look at and talk to when she wakes up.

 
When we got back home, Tom took his nap and I put together this cabinet for the craft room. It also serves as the nightstand when the inflatable bed is up for our guests. Turned out pretty well, I think.  I spent several hours putting things away and getting the room ready for the bed since we will have a house guest next week.   But I had to do a little crafting too -
 
 
This is a gift for a friend who recently had a baby.  I call it a shelf sitter.  This is the front panel.  I knew I wanted to use Soft Suede and love the way So Saffron looks with it.  I found a piece of retired Designer Series Paper that I thought looked good with those two colors.
 
 
You open it up like an accordion and set it on the mantle or a shelf.  She can add a picture of each of her kids to this side.


You can also put photos on the back or just leave it plain.  When you want to change things up a little just turn it around for a different look.
 
Since I had just a few scraps of the DSP left, I figured I would just put together a few cards to use it all up. 
So here are the anniversary cards I put together.  So all in all it was a pretty productive day.  Love days like that! 

Friday, August 16, 2013

New technique - baby wipe plaid

I found a new technique on  You Tube - baby wipe plaid.  It is very easy and you get a unique background for your card front.
I created a tutorial for the technique which you can find here - Baby Wipe Plaid

 
For this group I used Basic Gray plus two retired colors, Not Quite Navy and More Mustard.
 

By using the baby wipe on numerous pieces of card stock, you can get variations of color.  This one was the third or fourth piece I did in this group. 

Here I used Gumball Green with the retired Not Quite Navy and More Mustard.  i also made 4 pieces with the same inked applicator for this combo.

This was my favorite card of the groups. It makes a nice masculine card but is more interesting than just a piece of plain card stock on the front.


This is another favorite - using Rose Red, Gumball Green and Island Indigo.    I added a little bit of the Island Indigo baker's twine to the image to give it some depth. 
Le

Saturday, August 10, 2013

The family that Crafts together - laughs together ??

Some family craft time today - first some family and friends who are like family got together to make some cards.  So much fun!  Had some new techniques to show them and they loved all three.

This is a new technique to everyone - baby wipe plaid.   It uses glossy white card stock and a couple baby wipes folded into a applicator.  Drops of ink are put on the baby wipe and then smeared on the paper.   I found the technique here - Baby Wipe Background
 
 
This card used a baby wipe to make a stamp pad that is inked with drops of several colors.  I've done this years ago but don't use it very often.  It was fun for the oak leaves in the Lovely As A Tree stamp set.  The sentiment is from the Trust God set.  Don't the Calypso Coral candy dots make the card pop?

 
My favorite new technique uses painter's tape - yes, the blue tape you use to mask off areas where you don't want the paint to go.  Take a strip of the painter's tape and lay it on the ink pad so the sticky side is against the pad.  Rub gently with your finger tip then take the tape and lay it across the card stock.  Run a little - remove the tape.   You can repeat if necessary to get the amount of ink you want.  I found the new foam pads worked best but the old woven ones were okay - you just have to rub harder.

After the card makers left, my daughter and granddaughter came over so we could work on a mobile for the nursery.  My daughter found this idea on Pinterest.
 
 
The nursery is yellow and gray so my daughter wanted it to match.  We found a yellow plastic embroidery hoop at Michael's and some clear fibers for making jewelry.  Total cost was about $8.  Of course, I had lots of paper so I pulled out Smoky Slate, Daffodil Delight, Crushed Curry and So Saffron.  I also had some designer series paper (DSP) with stripes and polka dots in gray/white and yellow/white.  I cut out lots of circles and flowers using the Circles Framelits and Floral Frames Framelits.  So easy and quick! I glued the DSP on some solid card stock to make it sturdier. 
We took 4 yard lengths of the fiber and looped it over the hoop.  Then pierced a small hole in the center of a shape and ran the two ends of the fiber through the hole.  Tied a small knot in the fiber.  


We just did it randomly and sometime put two shapes close togetherso when it hangs the two line up and looks like the center to a flower, etc.
 
 
Here is what it will look like from the crib.   With the ceiling fan on the shapes will turn and seem to float in the air. 
We put 7 strands of shapes on the hoop and I adhered by putting a little Crystal Effects where the fiber is looped over the hoop.  I took three more strands of the fiber and evenly spaced them around the hoop and pulled them up to form a hanger.  I added a little Crystal Effects to them too.   We are going to tie those three strands to a small curtain ring and then hang it from the ceiling. 
I'm pretty happy with it.  Glad my daughter wanted to try it.    Love finding things on Pinterest that are useful :-)

Tuesday, August 6, 2013

Dinner for Two and a Show

This week our younger daughter is volunteering at a camp in Indiana so we have an empty nest. So I am cooking for two - which really means cooking for four since Tom usually takes leftovers for lunch but now we each can take leftovers.    And it is time to get serious about maintaining my weight as it keeps creeping up since the Wellness Wins ended.   I have a 40 year class reunion and our 25th anniversary cruise in October so time to buckle down and cut out the junk food.
So tonight it was Pan Seared Salmon with Tomato Relish, Roasted Sweet Potatoes, Cucumber Salad  ( I used red and yellow bell peppers in place of the tomatoes) and Cantaloupe.  

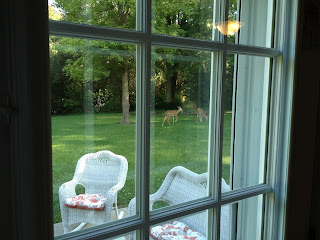
After eating, Tom was at the kitchen sink doing his usually dishes and cleaning up and he said "Come here quick".    Right outside the kitchen window were two fawns.
We locked Buddy out of the kitchen and stood and watched them for a while.


Not the best photos - but they were sure a sight to behold!

Sunday, August 4, 2013

Favorite Color Combo

My favorite color combo (at least this week) is Crushed Curry, Marina Mist and Calypso Coral.  I used that on a card last week and just fell in love with it.

 This is the card that started it all. 
Card Stock - Crushed Curry, Calypso Coral
Paper - Marina Mist DSP
Ribbon - Crushed Curry Chevron
Candy Dots -  Crushed Curry
Stamp Set - Crazy for Cupcakes (retired)

And when you open the card.....

 a cupcake pops up!  I colored it using watercolor pencils and a blender pen.  Gave this one to a little girl at church who wanted to blow out the candle -- -now how could I rig that up ??

 And since I had this piece of Calypso Coral heart paper I made an anniversary card for some friends who celebrated their 32nd last week.  They are a special couple so wanted a special card just for them.  When you open it ......

hearts pop up.  This card is full of love - just like their marriage.  I have so many ideas for these pop-up cards.  And they are so easy!

 This one uses a masking technique to form a frame around the stamped image.
Card stock - Calypso Coral, Marina Mist, Crushed Curry, Whisper White
Stamp set - Simply Sketched
Ink - Marina Mist, Basic Gray
Markers - Calypso Coral, Pear Pizzazz

And one more with a new technique  - using painter's tape used to transfer ink onto the card stock.
Card Stock  -  Marina Mist, Calypso Coral, Crushed Curry
Stamp Set - A Word for You (retired)
Chevron Ribbon - Crushed Curry
Ink- Crushed Curry, Calypso Coral, Marina Mist.

Aren't these fun colors?  I think they reminde me of Dr Suess books or the movie Hook when Peter begins to 'see' the food - all the bright colors.