I learned this technique from my sister who is also a Stampin Up demonstrator. It is fun and easy!

I used Whisper White card stock with Blue Ballet and Not Quite Navy ink pads. The stamp set is Branch Out.

Attach a post-it to a scrap of card stock.

Punch through the post-it and card stock with the desired size circle for your moon. Be sure to punch the circle so that you get some of the 'sticky' part of the post-it on the circle.

Peel off the post-it and discard the scrap of card stock.

Press the circle post-it to the background card stock.

Sponge all over the background using the lighter color of ink. I am using the Ballet Blue here.

Add some of the darker color, Not Quite Navy, as desired. You can also leave the area around the circle (moon) lighter and gradually get darker with the ink as you move away from the moon.

When you reach the desired coverage, peel back the post-it circle to reveal the white moon. I have found the darker the sponging, the better the card looks.

Here is the moon -

Stamp with the tree from Branch Out.

Using a white gel pen, add a little snow to the branches and at the base of the tree.

The finished piece. Now to make it into a card.

This is the finished project.
 I used Whisper White card stock with Blue Ballet and Not Quite Navy ink pads. The stamp set is Branch Out.
 Attach a post-it to a scrap of card stock.
  Punch through the post-it and card stock with the desired size circle for your moon. Be sure to punch the circle so that you get some of the 'sticky' part of the post-it on the circle.
 Peel off the post-it and discard the scrap of card stock.
 Press the circle post-it to the background card stock.
 Sponge all over the background using the lighter color of ink. I am using the Ballet Blue here.
 Add some of the darker color, Not Quite Navy, as desired. You can also leave the area around the circle (moon) lighter and gradually get darker with the ink as you move away from the moon.
 When you reach the desired coverage, peel back the post-it circle to reveal the white moon. I have found the darker the sponging, the better the card looks.
 Here is the moon -
 Stamp with the tree from Branch Out.
 Using a white gel pen, add a little snow to the branches and at the base of the tree.
 The finished piece. Now to make it into a card.
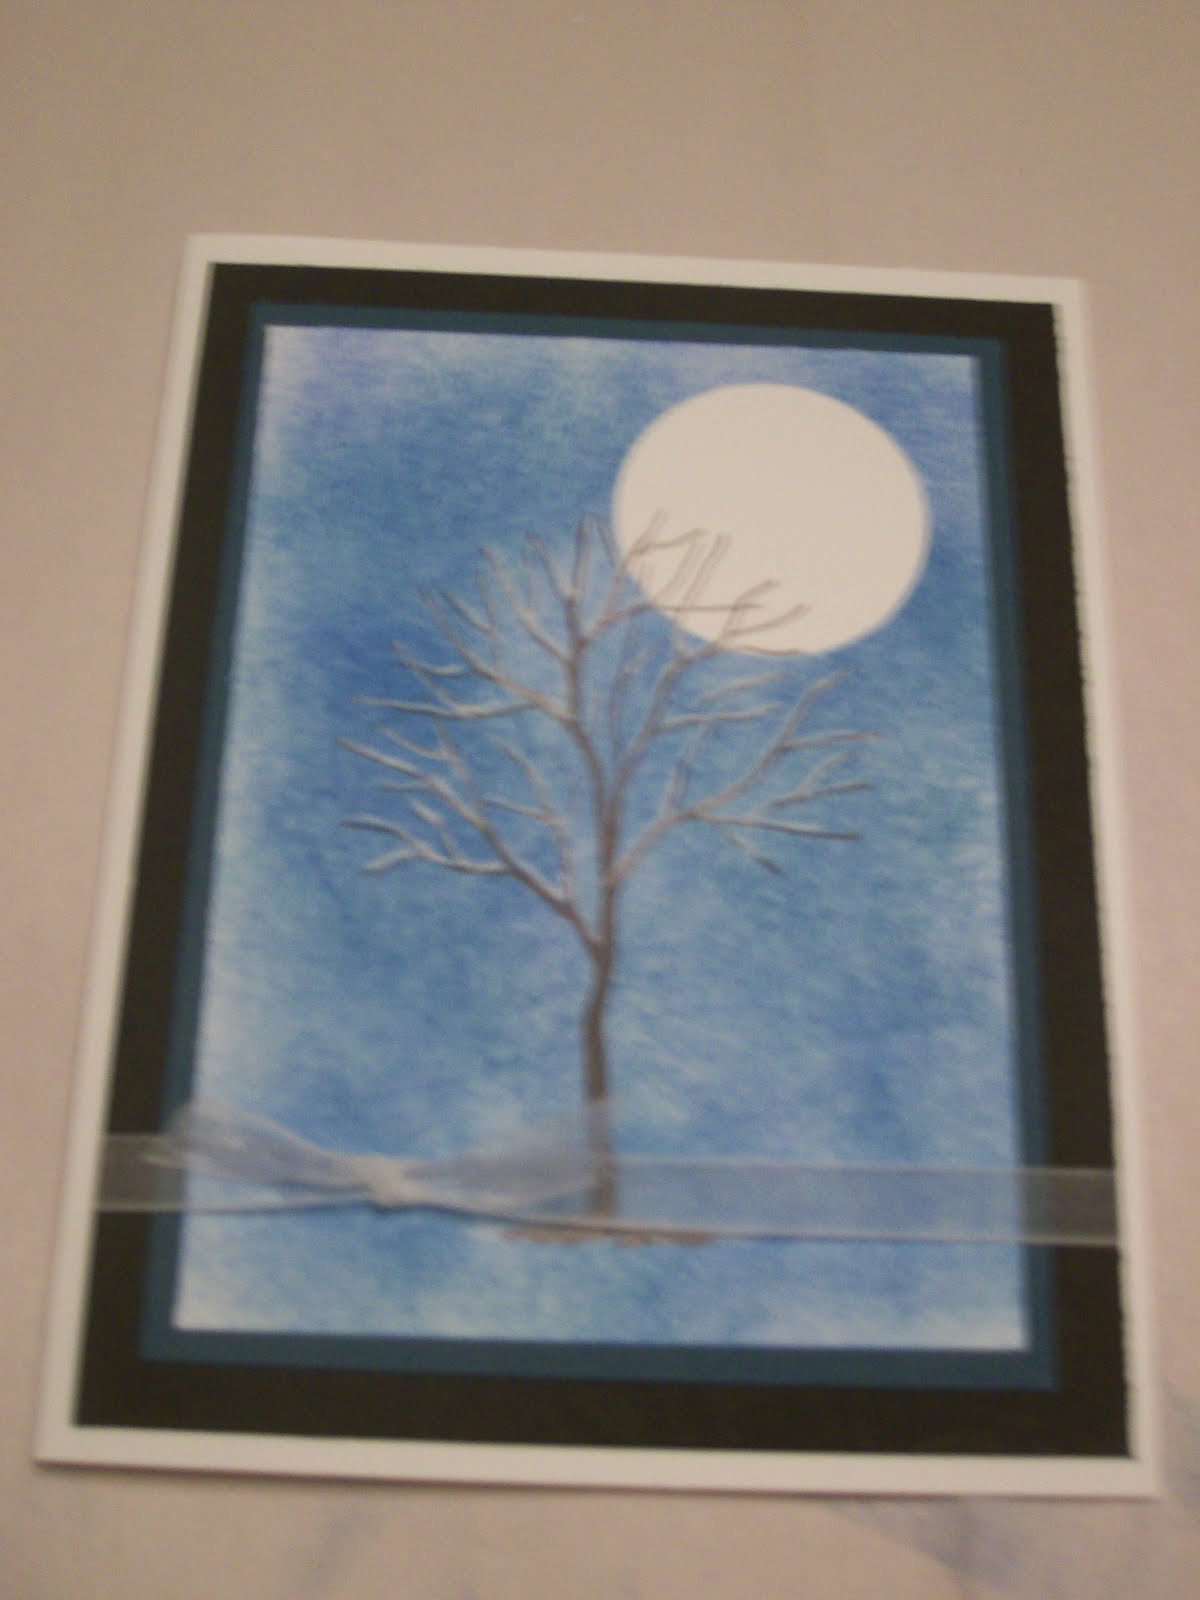 This is the finished project.


