Saturday, December 19, 2009

Make your own Dessert :-)

I promised DH's nephew a home cooked meal whenever he was back in the area. He is serving in the Army - currently in Iraq - and his bride is attending college in the Washington DC area. He is home for a couple weeks and today we had the honor of sharing lunch with them. We had a good time - and a good meal - but for dessert we did 'frost your own' sugar cookies.
I baked up enough sugar cookies so that each person got 4 on their plates. I prepared bags of frosting (I found a large tub of prepared decorator frosting at the store - so easy!) and had a variety of sprinkles available.
Here is our soldier and his bride busy at work on their dessert.
Here they are again with DD#2 in the picture. Not every day you are served sugar cookies on a china plate - and then given decorating bags :-)

This is DD#1 and her fiance. They seemed to enjoy the hands-on dessert.
DH concentrates on his decorating. He really got into it - and is letting his cookies sit until later so they absorb the moisture of the frosting.
These are his masterpieces.

Saturday, December 12, 2009

Mini-Christmas Show


A friend invited some of us to join her in a mini-Christmas show to try to promote our different lines of products. I had some things I made using Stampin Up supplies. Here are some pictures.
These are 'gift bags' made from card stock. They are really quite handy for a small gift to a friend. I think I will make some more for my own use :-)
Bookmarks- they just slide over the corner of the page in your book. Some are Christmas-y and others have friendship or birthday sentiments.
Gift card holders - to make a gift card a little more personalized. These are for birthdays or weddings.
And these are for Christmas. I can also add a Stampin Up gift card to one of these for a special gift for someone.
This was my big seller :-) Purses containing a pad of Post-Its. One of the other vendors sells purses at home parties. She bought a stack of these to give as a hostess thank you. They really are cute!
More Post-It notes. These are sort of all-occasion - friends, birthdays, thinking of you.
These are some of the Christmas ones.

And these are for teachers. Wouldn't they make a nice little thank you gift for a favorite teacher :-)

These are little treat boxes. They hold the square chocolate candies (Ghiardelli or Russell Stover) - or you can fill them with M&Ms or jelly beans or anything small like that. I think you could put several Hershey's miniatures in one as well.
And then I had lots of cards! This is a boxed set of ten all occasion cards. The box and all the cards have the medallion stamp as the focal point.
A snowman note card - no sentiment. This could be used all winter long or as a Christmas thank you.
This card uses the double sided paper. I love the Chocolate Chip color with the reds and greens of Christmas.
Another with the double sided paper.
And the same double sided paper but it looks so different here. This is the Patterned Pines hostess set stamps.
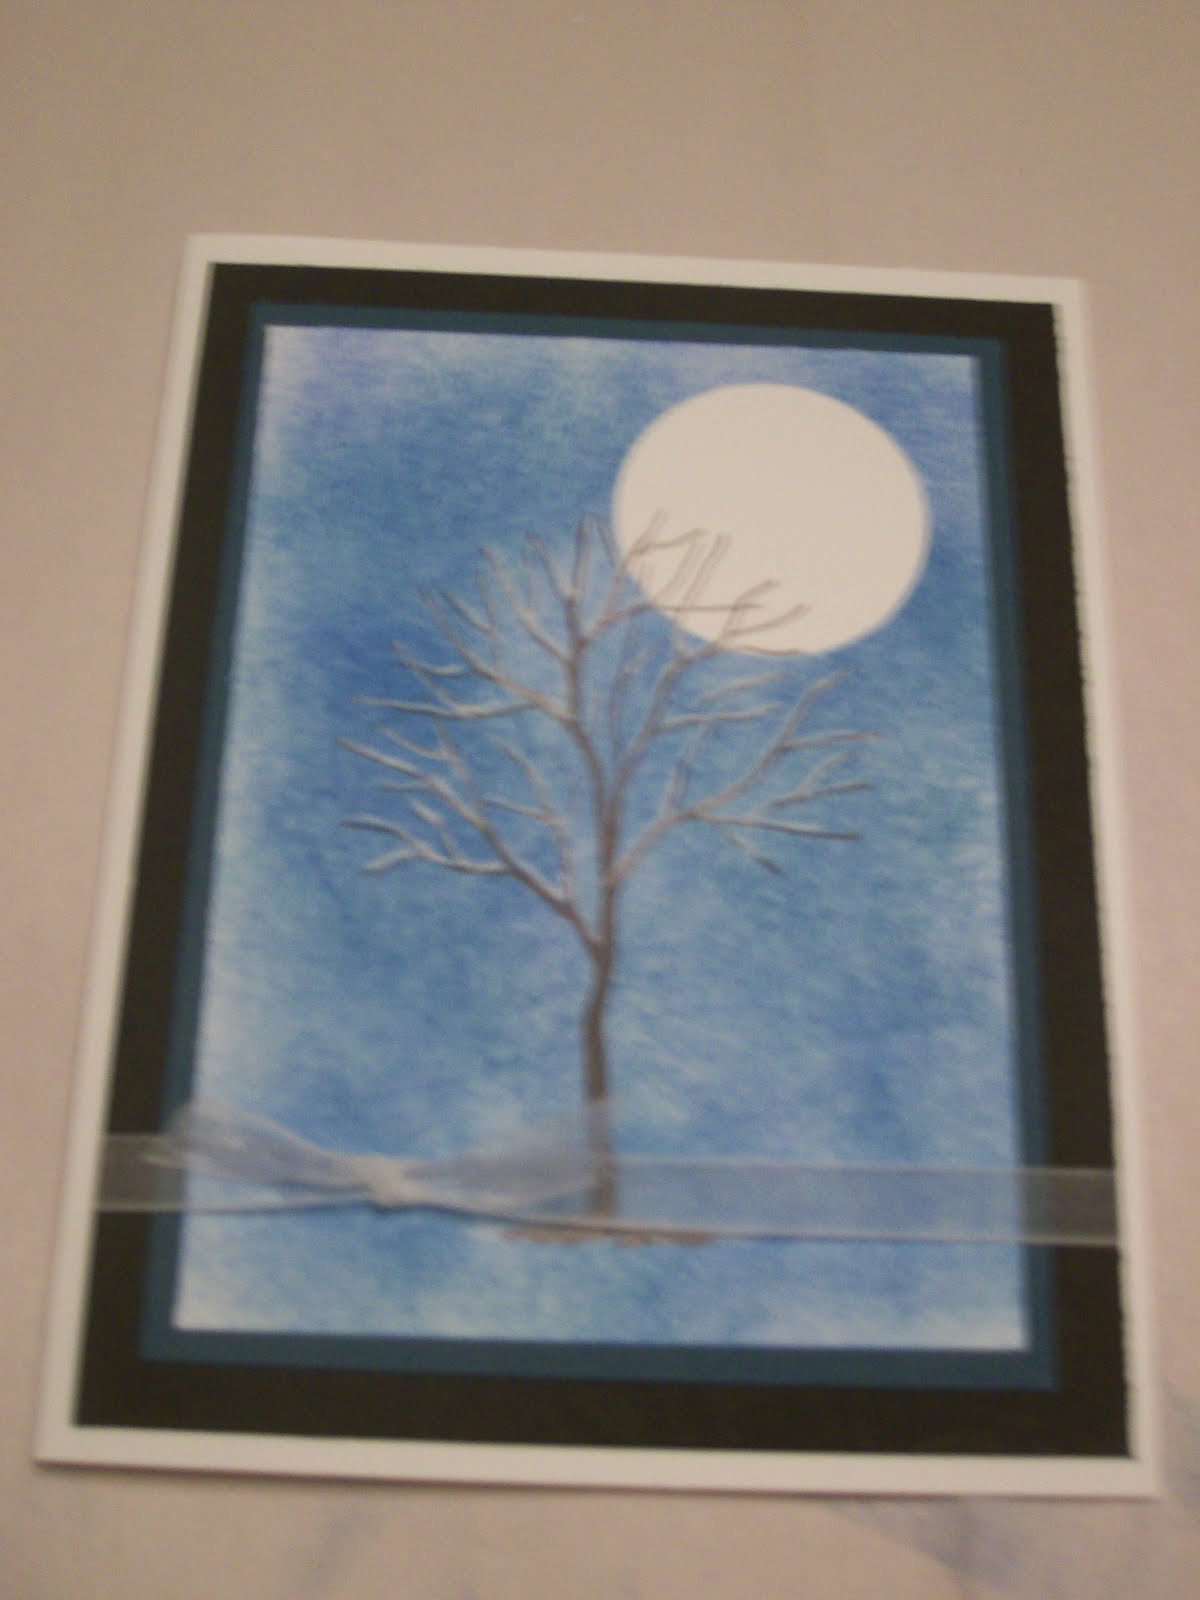
This was one I just threw together while playing. Turned out to be one of my favorites. The tree is embossed and then ink is sponged over the image to color the background.
Another patterned pines and this time the Chocolate Chip is mated with Ruby Red - another nice color combo.
And the ever popluar winter tree using the Branch Out stamp set.

It was fun making all the items and even though I had a slow sale day I enjoyed seeing old friends, making new friends, and getting a lot of knitting done :-)
If anyone is interested in any of the items or instructions for how to make anything I have here, post a comment.

Sunday, November 29, 2009

Snowy Winter Tree

I learned this technique from my sister who is also a Stampin Up demonstrator. It is fun and easy!
I used Whisper White card stock with Blue Ballet and Not Quite Navy ink pads. The stamp set is Branch Out.
Attach a post-it to a scrap of card stock.
Punch through the post-it and card stock with the desired size circle for your moon. Be sure to punch the circle so that you get some of the 'sticky' part of the post-it on the circle.
Peel off the post-it and discard the scrap of card stock.
Press the circle post-it to the background card stock.
Sponge all over the background using the lighter color of ink. I am using the Ballet Blue here.
Add some of the darker color, Not Quite Navy, as desired. You can also leave the area around the circle (moon) lighter and gradually get darker with the ink as you move away from the moon.
When you reach the desired coverage, peel back the post-it circle to reveal the white moon. I have found the darker the sponging, the better the card looks.
Here is the moon -
Stamp with the tree from Branch Out.
Using a white gel pen, add a little snow to the branches and at the base of the tree.
The finished piece. Now to make it into a card.
This is the finished project.

Saturday, November 28, 2009

Origami Christmas tree

(I can't believe it is the end of November and this is my first post for the month!)

Here is how to make an origami tree Christmas card.

Cut 3 squares of double-sided paper, one 2.5 inches, one 3 inches and one 3.5 inches. Cut a piece approximately 1 x 1.5 inches for the trunk - round 2 corners on a short side of the trunk. The paper I chose was solid Old Olive on one side and polka dots of Old Olive, Bashful Blue, Ballet Blue and Very Vanilla on a So Saffron background.


Fold the squares as follows:
Fold in half horizontally with the right side inside (the right side is the side you want to show on the tree when you are finished. I chose to have the polka dots as the right side.
Fold on both diagonals with right side out.
Open up and push in the two sides along the horizontal fold

Flatten to form a triangle
Take one corner and fold into the center line of the triangle
Repeat with opposite corner

Place on card stock starting with the smallest and working down with the other 2 in order by size. Overlap the top of the second triangle over the inside of the smaller one. Place trunk at bottom - tucked under the larger triangle.
Here are some that I made using this technique. I have an origami forest :-)

Tuesday, October 27, 2009

Scrapbook page - redo

I have modified the autumn days scrapbook pages from the last post - I like my new ones much better:-)
I changed it to the Apple Butter theme and used photos from the apple butter making at our former church from this fall. We spent the day helping out and catching up with old friends, meeting new friends.
I removed the tree stamped on Sahara Sand and used More Mustard instead. The tree is now an apple tree with a little birdhouse and big red apples. I sponged the edges with Elegant Eggplant which I really like.
The title was redone too - stamping APPLE BUTTER (I never can get my letters straight so I always purposely stagger them. I also sponged Elegant Eggplant on the edges. I really like that on the More Mustard.
Here is a closeup of the tree. Those apples are red ripe and look delicious :-) I still have 2 pages of Real Red from the Christmas Jingle Simply Scrappin packet, so I decided to do some more Christmas themed pages to show off this product at some mini-workshops I have scheduled over the next 4 weeks.
This one features the traditional ornaments that we three sisters make for everyone. It was so fast and easy using the heavy duty stickers that come in the Simply Scrappin packet.

I also did this one that has a picture of Aunt Faye and the quilt some of the cousins made for her. She is one of two aunts that I have which are still living. They are both widows of my mom's brothers. I left room on this page to put a journal writing of the story of the quilt. Some of the cross stitch squares have some very special stories.
And then just because I could, I made up some cards and gift tags lickety-split using the stickers in the Simply Scrappin packet. I did 4 scrap book pages and these cards and still have card stock, designer paper and stickers left. I used some of the designer paper on the Christmas cards this year and there was plenty for all 180 cards and then some.

I'm all ready for the first mini-workshop on Thursday evening. I have the long skinny shelf in my dining room covered with cards and scrapbook pages to highlight products in the Holiday Mini Catalog (Stampin Up) to entice those who attend the workshop.