Saturday, September 21, 2013

Love those Chevrons

Chevrons are everywhere!  And Stampin' Up has them too. 
There is a new Chevron punch in the holiday catalog.  Here I punched it in one direction then turned my card stock around and punched it in the opposite direction.   And check out the Chevron embossing on the piece of Crisp Cantaloupe. 


The Chevron punch makes a cute braid if you punch two sheets of card stock and reverse one and slide it into the other one.  For this card I just punched once on Daffodil Delight and Bermuda Bay. 


Here I punched a few longer row of chevrons.   The punch is very easy to use to make a continuous line.  The hardest part is getting each point to go through the opening in the other piece of card stock.  Just takes a little patience.
 

One more - a Christmas card idea.   I punched the chevrons on a piece of DSP for this one and wove it with the Baked Brown Sugar card stock. 

It seems like every package of DSP has a chevron pattern in it.   This is cased from a card I on another demonstrator's blog.  The pansy punch images are stamped on vellum.   I really like the black, vanilla and yellow combination.  I think I will be making more like this one.

And another chevron pattern in the Soho Subway DSP.  I used Night of Navy and Very Vanilla card stock to coordinate with the pattern. 


Another card with the chevron embossing folder.  I combined that with the chevron DSP. 


Tuesday, September 17, 2013

Paper Pumpkin and a Vacation Day - Perfect Combination

I took a vacation day today because the Maytag repairman had to come fix our washer and lucky for me - my September Paper Pumpkin arrived.   I had spent the whole day in the craft room but still had to open the kit and check it out. 

Here's what I received


Everything needed to make 4 cards, with everything precut or ready to punch out.   Even a half sheet of dimensionals (and I only used about half of those).   I pretty much kept to the design included in the kit.

The card on the far right is the original design.  I made it then decided to change it a little and made the card on the far left.   When putting the little chevron punch-outs on that card it hit me - wouldn't it be cute to 'hit the target'.  so I did the middle two cards with that in mind.   In no time I had 4 congratulations cards made and ready to use.  And they even included the envelopes. 
I not only had half the dimensionals left but I omitted the twine around the WAHOO piece on two of the cards and had quite a bit of that left too.  Plus I now have a WAHOO! stamp and a small YOU DID IT! stamp that can be used for all sorts of things. 

Some other things I made today....

 
I was asked if I could make a bookmark for a book-themed birthday party for a friend's 2 year-old daughter.  She had the quote and wanted a stack of books at the bottom.  I did not have a 'book' stamp but had seen some punch art books so took a stab at it.  I printed the words on regular paper and trimmed them down - then added the punch art books and put it on a strip of card stock to make it sturdier.  Added a little bit of ribbon and - too cute!
 
 
 I went through my Pinterest pins and picked out some cards to try.  This one had Smoky Slate card base with another piece of Smoky Slate embossed and sponged layered on top.  I like the look.  The flower is Crisp Cantaloupe and the leaves are Pistachio Pudding.  


And I played around with my Oval Framelits and some sponging.   I cut a smaller oval and positioned it over the oval shaped image and sponged with some Cherry Cobbler to make a frame for the image..  The larger oval and the image are Baked Brown Sugar.  The card base is Old Olive.    This could be used for any occasion but would make a cute Christmas card.
Guess what I did with the smaller oval that I used to mask when sponging the frame.....


made another card, of course.  I used the Chevron embossing folder for the Old Olive background and the Circle Framelits to layer the DSP on Cherry Cobbler. 
Chevrons are really popular right now and Stampin Up has plenty to play with.  More of that tomorrow....


Wednesday, September 11, 2013

Happy Fall Y'all

The summer has just flown by.  It doesn't feel like fall but I know it is just around the corner.    Made this cute little character in anticipation of colorful autumn leaves, pumpkins, bonfires and cooler temps.

I used the envelope liner die set.  This one was made using the smallest die but I have seen them made from the larger ones too.   Isn't he cute.  This would make a cute theme for a scrapbook page.

And the granddaughter is one month older. 

She is now 5 months old and in this photo it looks like she is trying to do the traditional family 'ee-aw' for the camera. 

This is a photo from her mommy and daddy's wedding in 2010 - see the family resemblance :-)

Monday, September 2, 2013

My Labors Today

My labor of love today was designing some cards for a family group and putting togehter some tutorials.  You can view the tutorials ...

Twister Pattern


Pop-Up Cards and Sponged Butterflies


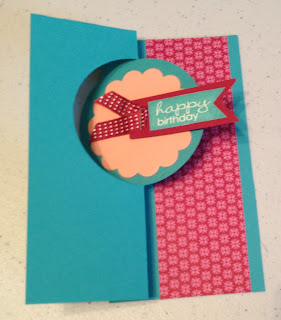
And while I was playing I made some more Flip Flop cards.  They are so easy with the Circle Card Die.
This one uses the Birthday Basics Designer Series Paper.  Colors are Bermuda Bay, Rich Razzleberry and Crisp Cantaloupe.
 

 And when it is opened....

 Similar card but used Raspberry Ripple instead of Rich Razzleberry. 

 And opened....


For this one I inverted the card to get the wider section to the left and the flip flop circle towards the bottom of the card.   I pulled out some retired Designer Series Paper and striped ribbon in So Saffron.  I used the star die that comes in with the card die set but the larger star was cut using the retired star punch.  It is all on a base of Midnight Muse.


And opened....


For this one I used a little different way of cutting out the card.  The extra flap on the right gives you more room to write a personal note.  The Designer Series is retired as is the Bashful Blue card stock.  

 Opened----- but wait there's more....


Completely open.  Lots of room for a note. 


Friday, August 30, 2013

Pop-Up Cards

Got back into the craft room after several days AWOL.  I wanted to play with a pop-up card design.  I made one several weeks ago when Sydnie spent the day.   This is the card I made that day.


Lots of stars in Pink Pirouette, So Saffron and Real Red.  Sydnie picked the colors and I like them together.
 

And when you open it, even more stars.  The strips of window sheet make the stars look like they are floating.
 
My first card tonight used the Blast Off set.  I stamped the space ship in Encore Silver and the flames in Encore Gold.  The colors on the card are Rich Razzleberry, Midnight Muse, and Crushed Curry.
 
Open the card and the planets, stars and alien pop up in the center.   Out of this world!
 
My second design - something feminine.  The designer series paper is Gingham Garden.  Colors are Daffodil Delight, Melon Mambo and Pear Pizzazz.
 
And inside - butterflies flit up inside the card.  The butterfly stamps are from Papillon Potpourri.  I used a dauber and added some Melon Mambo and Daffodil Delight ink to white card stock then stamped the butterfly image in StazOn black over the inked area. 
 
And another one - this one has balloons made with the small oval and the foot from the owl punch.  The sentiment is from Perfectly Penned.  I sponged ink onto the stamp by putting Melon Mambo on first in the center area of the stamp.  Then sponged Bermuda Bay on one end and Old Olive on the other end.  You just have to make sure the colors overlap - so start with the lighter color and work up to the darkest.  I also had to reink a couple of the stamp pads to get enough color from the sponging. 
 
And when you open it -
balloons pop out.   I took some white baker's twine and put it between two balloons on the end of the window sheet strip.  I put a very small amount of Tombow liquid glue along the window sheet to hold the twine in place. 
 
And just have to share a baby photo -
 
This was taken by a family member last week.  Don't you just want to squeeze her :-)  What a sweetie - (not biased at all) 

Wednesday, August 28, 2013

Stay-cation

Last week I took a staycation - sort of.  We had out of town guests and a family get-together on Saturday so I decided to take some time off and we did some tourist things in the area.
 
On Wednesday we went shopping - antiques, crafts, etc.  My 'find' was a patchwork design called "Twister".   I couldn't wait to try it with Designer Series Paper -


It is a simple technique once you know the trick.  I'll probably be posting a tutorial soon.   We saw some lovely quilts and wall hangings using this little design.

On Thursday we visited Aunt Faye.  She suffers from some memory loss but she always can make us laugh. She has such a great sense of humor.  Then we introduced some of the family to the granddaughter - what fun!

On Friday, we sent to the Missouri Botanical Gardens and had a personal tour by our niece who works in the children's section.  It is a beautiful place. 

This cutie and her mama joined us.  We had a great time.  For lunch we met a high school classmate of my sister's at Square One Brewery and then stopped in to admire some glass art work at a nearby shop. 

Saturday was the Phamily Phish Phry on Phred's Pharm :-)   It was hot but the young ones enjoyed the pool.  The horses even went swimming.

Sunday - after everyone was gone, I played with my new toy - the Circle Card die. 

It makes a cute and easy flip card.   I used Gingham Garden DSP.  The stamp set is Petite Pairs.    This is the front when the card is folded.


And when you open it, the flip side.  Such a fun card and so easy with the die. 

Monday, August 19, 2013

Paper Pumpkin is here!

Stampin Up has a new 'product' called Paper Pumpkin.  It is sort of a kit of the month club.  And if you sign up before Aug 31, you get 2 months at a 50% discount!   So I couldn't resist.  I got my introductory kit today.

 The Paper Pumpkin is like a 'magical' box - full of everything you need to complete the project.  It arrives in a cute little orange box.  It is a monthly 'escape' from reality.

 Inside the contents are neatly wrapped in tissue paper (which of course I will keep to use on other projects :-)   ) 
Included in the introductory kit was a small Basic Gray stamp pad and an acrylic block which will be used in future kits as well. Also a couple clear mount stamps, buttons, card bases (pre-scored and there are special card stock that is Basic Gray on one side and Whisper White on the other), pre-cut DSP to decorate the card front and a sheet of pre-cut punch out designs to use on the cards. Oh, and envelopes of course! There are supplies for making 4 cards and you can use the stamp set and ink to make other projects of course.
You can make them just like the design or make you own designs to customize them. What a great way to have some quick cards on hand. If you don't need a particular card right now, just make up the designs but don't stamp the sentiment - then when you need a birthday card, just stamp the sentiment. Or just use it as a blank note card.

 This is the card design included in the kit.  Very quick but cute.  The precut shapes have adhesive backing so just peel off the sheet and place on the card.   All I needed to supply was some adhesive for the yellow polka dot background and the button.

 These are the 4 cards I made.  It took me less than 10 minutes to assemble them all.  What a deal!
 
If you would like to join in the fun- just sign up today on the Stampin Up website - Paper Pumpkin
And if you sign up before Aug 31, enter the code PUMPKINDEAL and get two months at the discounted price of $10.00 (plus tax).  Be sure to enter me as your demonstrator - Mary Cavalier.