Showing posts with label technique. Show all posts

Thursday, September 26, 2013

Faux Patina Technique

I have seen many examples of the faux patina technique and have been wanting to try it for a while.  Someone asked me to make an anniversary card for 7 years - which is copper - so I had a good reason to do some patina.
This one has a strip of the faux patina with some crocher trim. The card stock used is Early Espresso, Always Artichoke, and Crisp Cantaloupe.  The stamp is from Simply Sketched.


The patina hearts are layered on Cajun Craze and arranged on Always Artichoke, Early Espresso and Crisp Cantaloupe with a Crumb Cake seam binding bow.

These three hearts are mounted on Early Espresso and then arranged on Always Artichoke, Early Espresso and Baked Brown Sugar.

Coastal Cabana, Baked Brown Sugar and Crisp Cantaloupe.  A little extra with the embossing on the front and...

some pop-up hearts inside.   I really enjoy making the pop-up cards.  I hope people enjoy getting them as much.

Some Calypso Coral, Early Espresso and Island Indigo for this card.   The hearts on a Very Vanilla ribbon and then you open the card and...

the ribbon falls out with more hearts attached.  Just another fun card.  I'm not sure any of my patina experiments really look like tarnished copper - but it was fun and it gives a special touch to the cards. 

Friday, August 16, 2013

New technique - baby wipe plaid

I found a new technique on  You Tube - baby wipe plaid.  It is very easy and you get a unique background for your card front.
I created a tutorial for the technique which you can find here - Baby Wipe Plaid

 
For this group I used Basic Gray plus two retired colors, Not Quite Navy and More Mustard.
 

By using the baby wipe on numerous pieces of card stock, you can get variations of color.  This one was the third or fourth piece I did in this group. 

Here I used Gumball Green with the retired Not Quite Navy and More Mustard.  i also made 4 pieces with the same inked applicator for this combo.

This was my favorite card of the groups. It makes a nice masculine card but is more interesting than just a piece of plain card stock on the front.


This is another favorite - using Rose Red, Gumball Green and Island Indigo.    I added a little bit of the Island Indigo baker's twine to the image to give it some depth. 
Le

Sunday, April 14, 2013

Scraps challenge

 Today I challenged myself to use up some scraps.  I have so many of them that they are taking over the craft room :-) 

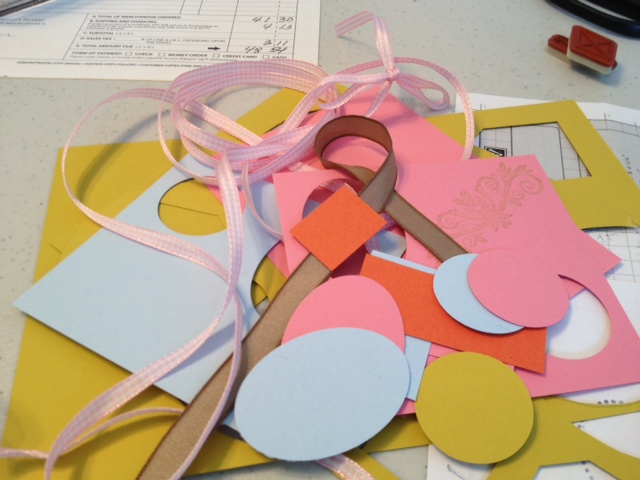
I pulled these from the Whisper White supply.  Two are embossed with the Honeycomb folder and one was a piece cut with the Top Note die.  This were from other projects that I did not need for some reason - and just threw them in with my stock.

To go with those I grabbed these items from a shoebox where I had thrown items left over from a day of crafting - to sort and put away later and that never happened.

So - here is the first card I finished. I used one of the honeycomb pieces and spritzed some Summer Starfruit on it.   Then I took 4 other colors - Regal Rose, Bashful Blue, Tangerine Tango and Wild Wasabi and cut strips.  The Wild Wasabi was embossed with the SAB Vine folder. 

To get the rounded edges, I placed just one end in the 1 1/4 circle punch.  The strips were about 1 inch wide.   This works great!

Then to get the 'stairstep' lengths I took the shortest one (Wild Wasabit) and laid it on top of color #2 - Tangerine Tango.  I just cut the second piece a little longer using a pair of scissors. The edge did not have to be prefectly straight since I was going to cover it with ribbon.  I did that with the remaining 2 colors.

I lined them up on the lower portion of the card front (The photo is really upside down).  The hexagons on the white made it easy to get these in a straight line.  Then I just wrapped the ribbon around over the edges of the strips and added the flower.  


This one also uses the honeycomb background.  The Wild Wasabi is the remainder of the piece of Wild Wasabi with the vine embossing.   I tied around the scrap of Soft Suede ribbon and mounted that on a piece of Soft Suede card stock and then put it all on a Whisper White card.   I tried adding circles and ovals of the other colors but just did not look right.  At one point the ovals on the green might have made a cute Easter card but I did not want to go that direction.  So I just added the simple Hello stamp from the Tiny Tags set and said "Done!"   I like it and it is such a simple design I  will probably make more  :-)


Number 3 uses the Top Note die.  I adhered it to a piece of Regal Rose so that it hung off the edge - then trimmed it flush.   The swirly stamp is from a retired set but any decorative stamp would do.   The Certainly Celery satin ribbon is accented with a piece of Pretty in Pink gingham ribbon that I found on the clearance rack a couple years ago.  I hate to see Pretty in Pink leaving since I use it a lot for baby girls (and have that new granddaughter !) I'm sure I will find alternates.  I used the birthday sentiment from Petite Pairs ......


and stamped the other half of it inside with another one of the decorative swirls.  I think this is the favorite of the 3 scrappy cards I made.

So here is what I did with my scraps.......

or at least some of them.  This is what I had left after making those 3 cards (see the ovals and circles that I tried to use on card #2)   Saving those for another day :-)

And speaking of the new granddaughter - meet Adelyn Kaylee --


here she is 4 days old and visiting Grandma and Grandpa at work.  We just love her!

Tuesday, May 8, 2012

New Technique - Open House

I have found the new technique that I will teach at my open house on June 1.  It is called waxed paper resist and is so easy, no special tools and versatile.  (sorry I won't tell you how until June 1).
This is the card we will make at the open house.  The scalloped circle is the piece that was done with the technique.
 The stamp set is Language of Friendship and I got mine free during Sale-a-bration.  The stamp coordinates with the Bird and Boho Blossom punches.

 Here is a close look at the sentiment and you can see more detail of the scallop circle in the lower right hand corner. 

 I tried to get a  closeup of the scallop circle but it is not that good.  Hard to take photos of glossy paper :-)

 These are samples of the waxed paper technique using the new IN colors,  From Left to Right:
Gumball Green
Midnight Muse
Summer Starfruit
Raspberry Ripple
Primrose Petals

 Each time you do the waxed paper technique, your result is unique.  The design on this sheet is different than .....

the design on this sheet.  It will be so much fun to see all the different 'patterns' on June 1 - won't you join us?   Refreshments, a take-home card that you made, and attendance prizes - and it's free :-) Anyone who RSVP's will get a double chance at the attendance prizes.
You can find all the details about my open house on my Calendar Blog.