Showing posts with label Stampin Up. Show all posts

Sunday, July 17, 2016

2016 IN colors - WOW!

I am loving the new IN colors at Stampin Up.  They are so bright and 'happy'.  I've been playing with them lately and completing some cards for some challenges.

 This card shows all 5 colors (top to bottom) Sweet Sugarplum, Dapper Denim, Peekaboo Peach, Emerald Envy, Flirty Flamingo.  This was for a one layer card challenge.

 This also uses all 5 colors.  The flowers are stamped and then punched.  To give them some dimension, I placed them face down on the foam pad and rubbed with a stylus.  I made the petals curve.  This was for an IN color challenge.

 And again I have used all 5 on the flower.  I stamped it in Stazon black then colored with the Stampin Markers.   This was for a challenge to use a black background with some color.

 This charming little card uses Flirty Flamingo and Peekaboo Peach.   The ribbon and enamel stars take it up a notch - and then the envelope liner puts it over the top!

 Another card using Peekaboo Peach and Flirty Flamingo.  The sequins were left from a Paper Pumpkin kit. They went well with the colors.  The onesie is from a Stampin Wheel I have.  I stamped it onto the envelope paper and cut it out.  I stamped on a piece of Peekaboo Peach and cut out the star, then added it to the onesie.  I like the shaker - makes it WOW!

 Speaking of WOW!   This slider card will wow the recipient.  Again using the 5 IN colors.  I used a tutorial at Splitcoast Stampers for a Tab Slider Card. I made a few modifications like using the Word Window punch to make the slider track.

 Pull the tab and you have a surprise.   I made one this morning for a friend at church who is involved in a program that uses boxing to treat patients with Parkinson's Disease.  I regret I did not get a photo :-( before giving it to him.  I used the mitten punch and some images for boxing gloves on the internet to add some lines and trim down the cuff so it looked like a boxing glove.   Put it on the slider and added a sentiment that I hoped his birthday had a lot of 'punch'.  He has 3 little boys and I bet they enjoy the card  - maybe his older girls also.


This one was a little trickier I want to try a few more.   I think they would really be fun for a small child who might believe it is actually magic.  


Pull the tab and the image is magically colored.  I need to look through my stamps for some good images to use for these.

Saturday, April 9, 2016

PJ Masks party theme

It's birthday time for the granddaughter - she's 3!  Her choice for the theme is PJ Masks.  I knew nothing about them.  Evidently they are a kids' show.  I spent most of the day in my craft room making party goodies.


I found some printables on Pinterest and got some assistance from my sister.  I saw a banner on Pinterest that used a sunburst type shape but I do not have the sunburst framelits.  My sister does and she cut the shapes from Gumball Green (Gecko), Real Red (Owlette), and Pacific Point (Catboy). Also some smaller white ones for the middle of the banner pieces.   A couple weeks later I decided I needed some sunbursts to make cupcake picks so once again she came through, cut the shapes, and mailed them. 


For the cupcake picks, I used toothpicks.  I wish I had picked up a box of flat ones because the round ones were a little harder to work with.   I put some Tombow glue on the back of the circle and place the toothpick on the glue.  I added a piece of transparent tape just for reinforcement.


 I turned them over and added the printables which I had punched with the 1 1/2 circle punch.   I added a couple dimensionals to the back and....


put them on the sunburst circle.   They turned out pretty cute !  They will be just the right touch !


The banner is made with sunbursts in a couple different sizes.  I used a regular circle layered between 2 sunburtss.


 H A P P Y   B I R T H D A Y - Makes the banner pretty long.  I like the bright colors -very festive! And while I had everything out, I made a couple cards.


I used some of the printables and did a bi-fold card.  The 3 heroes are helping me wish a happy birthday to the sweetest little girl I know.


This shows how the card opens.  


I had to try another card that I saw recently.   The original was 4 sides but I tried with 3.  It turned out great!  When putting it in the envelope you can flip the center circle around several times before putting it in the envelope, when the recipient opens it the center circle will spin.

I printed some lifesize masks to make props for a photo booth area at the party.  I have Owlette, Catboy, Gecko, "Birthday Girl" word bubble, "3", and a couple lightning bolts.  I'll have to post some photos after the party.


These cards were still laying on my desk so I added some envelope liners.  I love the stacked coffee cup design.


Wednesday, March 30, 2016

Cards and re-using calendar pages

Just a few cards I made this weekend.   In December, the Paper Pumpkin was a calendar - individual pages for each month on a nice wire easel.  So what to do with those pages after the month has ended?  I couldn't just throw them away.   February was on a beautiful background of violets.  


So, I removed the month which was adhered with dimensionsals and that left a couple torn spots on the paper.  No problem - I just had to arrange my card so those were covered.


For this one I used Blackberry Bliss and Old Olive as they seemed to match the card.   Pretty simple but love the colors.


 And then I wanted an accent color and just hap
pened to have So Saffron on the table from another project.  I wanted the birdhouse to stand out so I stamped it on a second piece of Whisper White and cut it out with a small circle punch (maybe 1/2 inch) and popped it on with a dimensional.


While I was playing I wanted to try a card based on one I saw on Pinterest.   The original had used a pale pink, medium pink and dark pink.  I couldn't come up with a combination of pinks that I liked and tried with Calypso Coral and Crisp Cantaloupe and liked those together.  
The ribbon is from Sale-a-bration several years ago - Calypso Coral and Lucky Limeade.


Here is my version of the pleat card.  I have seen lots of these on Pinterest and decided it was time to try it.  Very easy and looks nice.  This one will be traveling around the Midwest in a Round Robin Shoebox party.  I will make up kits for 6 other cardmakers and send them to the first person.  She will make one of my cards and add her own kits to the box - then send to #3.  #3 will make the 2 cards in the box and add her own - and so on until #7 receives the box.  She will make my card (last kit) and all the others and add her own to the box before sending it to me. When I receive it, I will have 6 card kits to make some beautiful cards and will add a new card kit.  Wonder how long we can keep that going?


Saturday, January 16, 2016

Balloons, Balloons, and Balloons

I got several new balloon stamp sets and punches from the Occassions catalog.  Here are some of the cards I have made with all those balloons. 


I have some strips of this DSP left from our family shoebox party in October and it has been sitting on my craft table since then - so rather than put it away I just used it for some cards.
The sentiment and balloon strings are from the Party Wishes stamp set.  I used the new Balloon Bouquet punch.  It has 2 sizes of balloons.  Whipped up several cards in no time.
Colors are Bermuda Bay, Tangelo Twist and Crushed Curry. 


Negative punch on the strip with the DSP behind and then I used the balloons on the card as well.  This balloon punch is from the Party Punch pack.   It also has a cupcake and a candle. Colors are Tempting Turquoise, Tangelo Twist and Crushed Curry. The sentiment is from the stamp set, Party with Cake.


Same DSP - and used both the balloon punches to look like the balloons were floating off into the distance.   Colors are Crushed Curry, Island Indigo, Tangelo Twist and Pool Party.


Everything wasn't balloons though.  I bought the Tree Builder punch some time ago but haven't used it so thought  I should at least make sure it works.  The bird, tree and clouds are all pieces from the punch.  The colors are Tempting Turquoise, Chocolate Chip, Crushed Curry, Tangelo Twist and Whisper White.  The sentiment is from the Endless Birthday Wishes stamp set. 


And here is one that has been laying in my stash for a while.  I made it to use up some of the retired DSP months ago but just didn't know what I wanted to add to it.  I needed a card to send to a friend so grabbed the retired Haute Couture stamp set.  I added a bit of white gel pen to the images to give them a little depth.  I really like how it turned out!

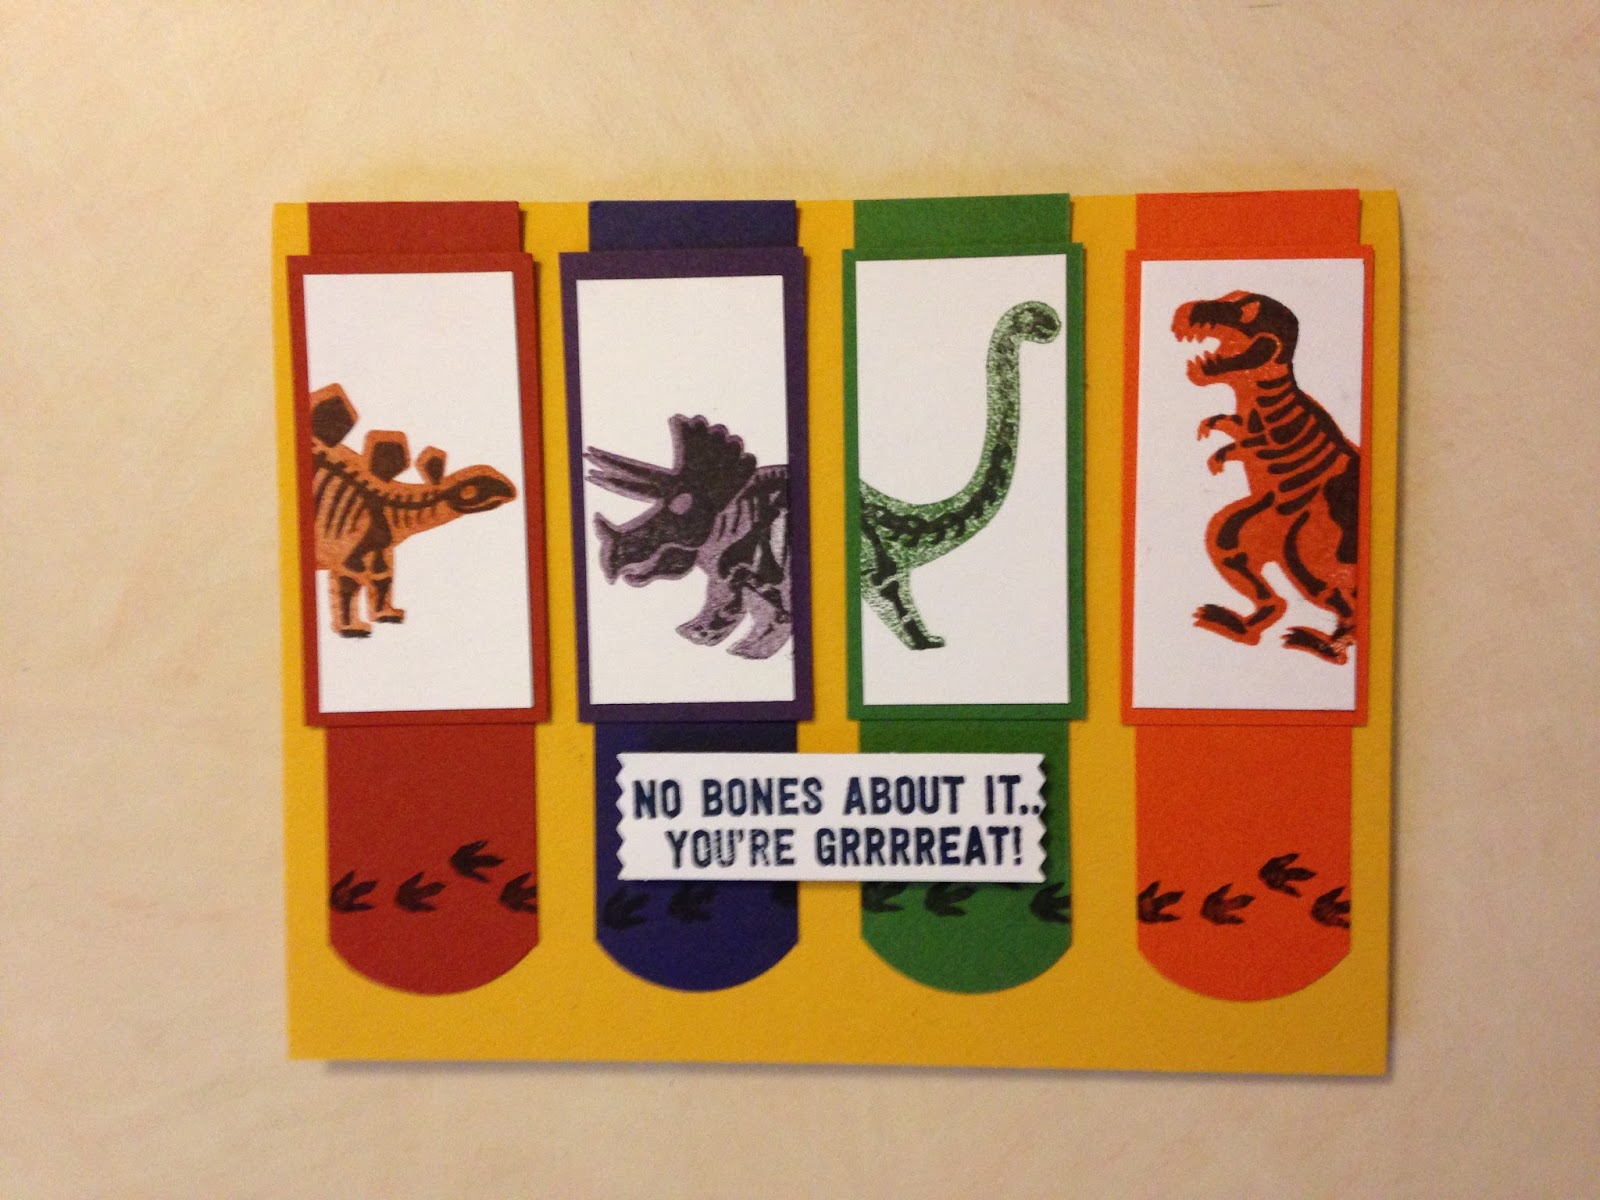
Dino-mite Cards

I've been busy making cards - and it feels good!  Haven't been spending much time in the craft room lately and I am running low on birthday and anniversary cards.  So today I spent several hours playing with some of my new toys.

The first as the No Bones About It stamp set.  It is a fun set with lots of  two step designs.  The photopolymer stamps make it so easy.


 I got the idea for this card on Pinterest.   There are SO MANY card ideas there.   I have several boards of pinned ideas.   The colors are Crushed Curry, Cajun Craze, Elegant Eggplant, Garden Green and Tangelo Twist.


While making the pieces for the first card, I went ahead and made duplicates.  Didn't want to make the same card so here is a different design.


And one with a balloon.  The card base is Island Indigo and the balloon is Pool Party.  


And how adding a star. 


For this one I used the Botanical Garden Vellum - free during Sale-a-bration.  The leaf design in the vellum shows up well against the Island Indigo card stock. I also used Pear Pizzazz and Night of Navy.  I stamped on the vellum with Tuxedo Blank Memento ink.  

 Another idea from Pinterest.  This one uses a circle of vellum stamped with the dinosaur body overlad on the skeleton piece.   The vellum is attached with a mini brad so you can slide is off .....


and there are the bones.   Who knew dinosaurs could be so much fun?  I certainly had a good time with these. 


Sunday, April 5, 2015

Baby Cards

Several months ago I posted some new baby stamps designs I was playing with.


Aren't they cute - wait until you see some of the cards I made.  I really got carried away with this cuties so I am stocked for quite a while.


I think this one is my favorite.  It uses 2 retired colors - Pretty in Pink and Not Quite Navy.  The DSP is Old Olive.  


These are a few other designs using the basket image.  Colors here are Not Quite Navy (I still have an unopened package of that paper - it is one of my favorites), Pool Party and So Saffron.


 And I love the paper doilies on these cards.  Colors are Blushing Bride, Old Olive and Daffodil Delight.

And this one - when I was cutting and punching the baby images these two were just lined up so perfectly I decided to not separate them.   This would be a good card for twins - or grandparents who have 2 grandchildren born within days of each other.   The card is Old Olive and So Saffron.  I like the layered ribbon on this one.

Sunday, September 23, 2012

A Fun Fold

I have seen a couple demonstrators post some cards with this little different fold so thought I would try it .  I like it - and so easy.


I used some of the Comfort Cafe DSP and this sheet has Soft Suede and Cajun Craze on it so thought those would be good fall colors.  The stamp set is te Mixed Medley hostess set but there are many different ones you could use.   


 The "friend" scallop sticks up off the edge of the inside flap of card stock.  Isn't that a neat way to dress up a card.

 And it opens completely  - of course there is a circle hole through the base but that really doesn't matter.

 
So while I was playing with the design I thought I would try a Halloween one.  This uses a retired set Batty for You but there are some cute sets available now.   The spider web is from the Mixed Medley and I added some of the Googlie eyes available in the holiday min-catalog.
 
You could do this for any occasion - wouldn't it be cute with a balloon stamp//cutout used.   I think I will have to try it with a bunch of balloons on the card front and one of them is attached to the inside.  Oh boy!  More play time coming up.


Saturday, September 22, 2012

Cards and more cards

Today I finally got to play a little with some new toys and some ideas I have seen from other demonstrators.   It was fun and I think we will do a couple of these at the club on Saturday. 


This is one I have had planned for a while.  Still need to add a sentiment in the lower right corner.    I saw the flower pot punch art on a another site so had to try it.


Here I got to play with more of the Perfectly Preserved stamp set and coordinating products, Orchard Harvest paper and Cannery framelits.    I used the spritzer to add some of the Raspberry Ripple in the background - can't see it very well in the photo though.

This is one of my favorite techniques - triple layer stamping.   It is so easy but looks so nice with the designs all lined up.    French Foliage is one of my favorite sets - it was in the holiday mini-catalog a couple years ago and then they added it to the big catalog. 

 
And this is one of the easiest cards I have ever done but it is really striking in 'real life'  I have all the cards lined up on the entertainment center and this one catches my eye every time I look up.  The color is just scribbles with the SU markers - that's it !   Add a silhouette type image and a sentiment.    What fun it will be to try different color combinations.
 
And don't think I just sat around making cards today.  I made a big double batch of French Onion Soup in the crock pot and two batches of bread, French bread to eat with soup (can't eat french onion with a toasted slice of French bed and melted cheese floating on top) and some Italian Herb bread to take to a dinner at church tomorrow.