Showing posts with label card making. Show all posts

Wednesday, June 15, 2016

I'm still here

Haven't posted in a while - but I'm still here.  I have added a couple recipes that I made recently.
For our Freezer Blessings small family group, I made Honey Lime Chicken and rice.  Have I told you about our Freezer Blessings group?  Each month 5 cooks make 6 meals of the same recipe and freezes them.  Then on the designated date (usually after church on one Sunday) we swap meals with the other cooks so we go home with 5 different frozen meals (our own and one from each of the 4 other cooks).  Meal #6 is donated to a family that we want to encourage or help out in a small way.
I believe it started in January or February and was very successful the first month.  Most of the families were 5 or more. We have only the 3 of us, but we like leftovers and it is also nice to have them for a meal to prepare when our daughter and her family come to visit.
Several single ladies or couples commented they would like to do something like that but the meals would be too big for them. So we soon started a small family (3 or less) group.  I usually participate in both each month. For June, I made the Honey Lime Chicken and since one recipe makes 6 servings, I just split it between 2 quart sized freezer bags.   I also made a large batch of rice and divided it into quart sized bags.  The recipients will just need to thaw and heat!
For the large family meals, I made Cranberry Chicken Kabobs - a recipe from the Wildtree website. I really like the Cranberry Poppy Seed Dressing.  Tonight I made Cranberry Apple Spinach Salad.


I have also been busy with crafts.  I finished up a couple quilt squares for a Robots, Aliens and Outer Space themed stitch-along.

I used variegated floss for these cute little robots.  The original design did not have any back stitching but I just felt it needed some.  


I saw this chart on Pinterest and just had to do it.  The design was too large for the usual 14 count Aida that I use so I had to get some 18 count.   It was very easy to do the black stitches to outline the areas, then I just filled in with the colors.   I never noticed it before but Rosie from The Jetsons reminds me of Hazel from the series of that name.  Wonder which came first, and if Hazel was the idea behind Rosie.


A friend asked me to make a couple thank you cards so I played around a little during my lunch hour. The colors are Tip Top Taupe, Calypso Coral, Pistachio Pudding and Very Vanilla.   After stamping the basket and flowers with black Momento ink I sponged some Pistachio Pudding to color the leaves, Then I colored in the flowers with Calypso Coral and Crisp Cantaloupe.


This is a simple anniversary card I made recently.  I used the heart shaped framelits to cut out the hearts.  Pink Pirouette and Soft Suede go really well together.

Monday, April 4, 2016

And it's April already!

Here it is early April - which means another page comes down off the Stampin Up - Paper Pumpkin calendar.   I just can't throw the page away so will recycle some of the paper - or reuse maybe is more appropriate.


The spotted paper was from my March calendar page.  
The flowers are from the Flowering Fields stamp set which was a Sale-a-bration set this year. 
Add some Hello Honey and Always

On another note, I tried a new recipe that was a big hit.  

These were pretty yummy.  I think I will try them again and maybe add some black beans or corn.  The original recipe says you can freeze them so may have to stock up.


Finished up this square over the weekend.  It was a Valentine's challenge.  The chart was provided and each person could choose the colors.  I pulled some from the floss I had out for another project.   Actually thought I pulled 2 shades of blue but realized they were gray when I started stitching.   I think the colors look good together.  I'm sure it will be perfect for someone who receives a quilt in the future.


And April 4th - it's ice cream time.  Dad would have been 103 today.  We had our celebratory ice cream Friday evening. Bekah picked up blizzards on the way home from work.  (This picture is actually from several years ago - notice the naked nails - before Jamberry)


Tuesday, October 22, 2013

Lots of time for cards today

Last day of vacation and lots of time for cardmaking :-)  So I'll just shared photos of some of my favorites.
 I have been playing with the clay molds recently and here I have used one of the buttons.   I like the simple two- tone (Island Indigo and Whisper White)
 I also played with the sunburst design.  It is fun and I plan to put together a tutorial on this soon.

 This is also a starburst variation using DSP.  This one features the Sweater Weather DSP and the This and That washi tape.

 I worked with some more faux patina.  For the tab in the upper right corner, I punched out the Modern Label and took a scrap of Marina Mist with 'love' stamped on it and positioned it behind the opening.  Then I folded the Modern Label in half and adhered it back in place.  Added a color dot for an accent.  Easy and something different.

 I sponged the white doily with some Crumb Cake and Sahara Sand and then folded it twice. 

 And another faux patina plus one of the clay mold flowers.   I used the piercing tool and template to make a design on the card stock.

 I love these colors- Crisp Cantaloupe and Pistachio Pudding.  The clay button was made using Gumball Green re-inker to color the clay before molding.

The clay was colored with Cherry Cobbler before molding and the color came out very close to Strawberry Slush - so I combined them with Smoky Slate and Pistachio Pudding. 

Had a lot of fun today.  It felt good to just play with everything. 

Monday, August 19, 2013

Paper Pumpkin is here!

Stampin Up has a new 'product' called Paper Pumpkin.  It is sort of a kit of the month club.  And if you sign up before Aug 31, you get 2 months at a 50% discount!   So I couldn't resist.  I got my introductory kit today.

 The Paper Pumpkin is like a 'magical' box - full of everything you need to complete the project.  It arrives in a cute little orange box.  It is a monthly 'escape' from reality.

 Inside the contents are neatly wrapped in tissue paper (which of course I will keep to use on other projects :-)   ) 
Included in the introductory kit was a small Basic Gray stamp pad and an acrylic block which will be used in future kits as well. Also a couple clear mount stamps, buttons, card bases (pre-scored and there are special card stock that is Basic Gray on one side and Whisper White on the other), pre-cut DSP to decorate the card front and a sheet of pre-cut punch out designs to use on the cards. Oh, and envelopes of course! There are supplies for making 4 cards and you can use the stamp set and ink to make other projects of course.
You can make them just like the design or make you own designs to customize them. What a great way to have some quick cards on hand. If you don't need a particular card right now, just make up the designs but don't stamp the sentiment - then when you need a birthday card, just stamp the sentiment. Or just use it as a blank note card.

 This is the card design included in the kit.  Very quick but cute.  The precut shapes have adhesive backing so just peel off the sheet and place on the card.   All I needed to supply was some adhesive for the yellow polka dot background and the button.

 These are the 4 cards I made.  It took me less than 10 minutes to assemble them all.  What a deal!
 
If you would like to join in the fun- just sign up today on the Stampin Up website - Paper Pumpkin
And if you sign up before Aug 31, enter the code PUMPKINDEAL and get two months at the discounted price of $10.00 (plus tax).  Be sure to enter me as your demonstrator - Mary Cavalier. 
 

Monday, July 29, 2013

More Madness of the Mosaic Sort

A few more Mosaic Madness cards from tonight.

Card Stock - Crisp Canteloupe, Early Espresso, Pool Party
Paper - retired Sweet Shoppe (I think)
Stamp Set - Perfectly Penned
Tool - Mosaic punch


 Card stock - Soft Sky, So Saffron, Midnight Muse
Stamp Set - Mosaic Madness, Bring on the Cake
Embellishments - Pearls
Ink - Midnight Muse
Tools - Mosaic punch, Mosaic embossing folder, Dotted Scallop Ribbon Border punch, Punch Pack


 Card Stock - Whisper White, Pool Party
Paper - Gingham Garden
Stamp sets - Mosaic Madness, Simply Sketched
Tools - Mosaic punch, 2 1/2 inch circle punch, Finishing Touches framelit
Ink - Pool Party, Island Indigo, Daffodil Delight

 Card Stock - Whisper White, Crushed Curry
Stamp set - Banner Greetings, Mosaic Madness
Tools - Mosaic punch, Mosaic embossing folder
Embellishments - Island Indigo baker's twine
Ink - Crushed Curry, Melon Mambo, Island Indigo

 Card Stock - Whisper White
Paper - Gingham Garden
Ink - Melon Mambo, Island Indigo
Stamp sets - Mosaic Madness, Banner Greetings
Tools- Mosaic punch, 1 1/4 inch square punch


Card Stock - Pool Party, Early Espresso, Crushed Curry
Stamp Set - Mosaic Madness
Tools - Mosaic punch, Punch Pack, Paper Piercing pack
Ink - Early Espresso


Still have more ideas from browsing through other demonstrators' blogs and online albums.

Sunday, June 30, 2013

The Old becomes the New


 I decided it was time to go back to my short hair style - and I mean short.   It has been about 2 years since I started growing out my hair.  At first it was just because it was hard to find a date and time to get it cut since my stylist was cutting back some of her evening hours and I was putting in a lot of overtime plus carpooling with my husband and it was nnot always convenient for both of us to stop after work.  So I decided I would let it grow and my goal was to have a ponytail again  - and I did.  It got longer than probably any other itme in my life.


 This is a photo of my ponytail yesterday morning.  It was usually pretty bushy but the end would fall into a large curl.   I wanted to donate it to make a wig for cancer patients but could not find a site that would take anything with more than 5% gray hair. One site would take the gray hair but would not use it.  They would sell it to another source, and use the money as a donation.  One site would take gray hair but encouraged you to find others to donate with you as it takes multiple ponytails to make one wig.  So - I did not donate my hair.  I will just make a monetary donation to the group that makes wigs for breast cancer victims.  My original goal was just to grow it out 'one more time' and I did that.  I definitely prefer it short :-) - but had to try it long again.

 And here I am - a couple hours later.   I went to a new stylist recommended by a friend.  She did great.  She worked on it for an hour and really worked to get it thinned out and cut so it laid just right.  I already have an appt for 5 weeks to get it trimmed to keep it neat.  So my 'old' haircut is not my 'new' one. 

And here are some other 'old things.....

 I found some time between cleaning nad putting things away in the craft room to get some cards made.  I forced myself to use some items I received several years ago from a wishlist that was going among the demonstrators.   I did not have the stamp see for the 'get well soon' and asked for someone to stamp a bunch for me so I had those to use up.
The designer series paper is also a wishlist item.  I did not have that particular paper and a friend sent me a 6 x 6 inch square of each in that collection.   So I used the Fancy Flower punch that coordinates with the floral design in the paper and went to work.  These are my favorites of the ones I made using those supplies.

 
 I also grabbed a piece of my own retired designer series paper and made some masculine ones.   Love the Soft Suede and Baja Breeze together.  Too bad Baja Breeze is retired but I'm sure Soft Sky or Marina Mist will also look nice with the Soft Suede or the new Baked Brown Sugar IN color.

 Oh - and after getting my hair cut, I treated myself to a cupcake - not old itself but I used a gift card given to me by a friend that I have had for almost a year I think.  And I chose the Munypolitan - a neapolitan cupcake (dark chocolate, strawberry and vanilla layers) that commemorated the St Louis Muny Theater which is old.  I remember going to the Muny for the first time when I was about 10 years old.  My sister and I were staying with an aunt and uncle in St Louis and they took us to see Guys and Dolls.  Soupy Sales played one of the 'gamblers'.  He was probably the only star I knew if the show but I remember my uncle talking about one of the other men being a former football player.   Loved the Muny and went there often in the 70's and 80's and a couple times with my daughters when they were young.  Really need to make that a 'new' experience again :-)

Sunday, May 5, 2013

CASEing the new catalog


 Some of the products I used are not in the new catalog but I got the idea for these cards from one shown in the new catalog.  I used scraps of ribbon from the Mother's Day workshop today to put together my colors.


 This one uses Pear Pizzazz and Soft Suede.  The embossed piece was a scrap I had leftover from another project.

This one has Basic Gray and Pink Pirouette with some Whisper White. I like how the stitched grosgrain ribbon coordinates with the gray with white polka dot stripe in the paper. 

It really has been a fun and productive day in the craft room.  I need to get busy on some scrapbooks - so maybe the mood will hang around for a while and keep me motivated.

Sunday, April 14, 2013

Scraps challenge

 Today I challenged myself to use up some scraps.  I have so many of them that they are taking over the craft room :-) 

I pulled these from the Whisper White supply.  Two are embossed with the Honeycomb folder and one was a piece cut with the Top Note die.  This were from other projects that I did not need for some reason - and just threw them in with my stock.

To go with those I grabbed these items from a shoebox where I had thrown items left over from a day of crafting - to sort and put away later and that never happened.

So - here is the first card I finished. I used one of the honeycomb pieces and spritzed some Summer Starfruit on it.   Then I took 4 other colors - Regal Rose, Bashful Blue, Tangerine Tango and Wild Wasabi and cut strips.  The Wild Wasabi was embossed with the SAB Vine folder. 

To get the rounded edges, I placed just one end in the 1 1/4 circle punch.  The strips were about 1 inch wide.   This works great!

Then to get the 'stairstep' lengths I took the shortest one (Wild Wasabit) and laid it on top of color #2 - Tangerine Tango.  I just cut the second piece a little longer using a pair of scissors. The edge did not have to be prefectly straight since I was going to cover it with ribbon.  I did that with the remaining 2 colors.

I lined them up on the lower portion of the card front (The photo is really upside down).  The hexagons on the white made it easy to get these in a straight line.  Then I just wrapped the ribbon around over the edges of the strips and added the flower.  


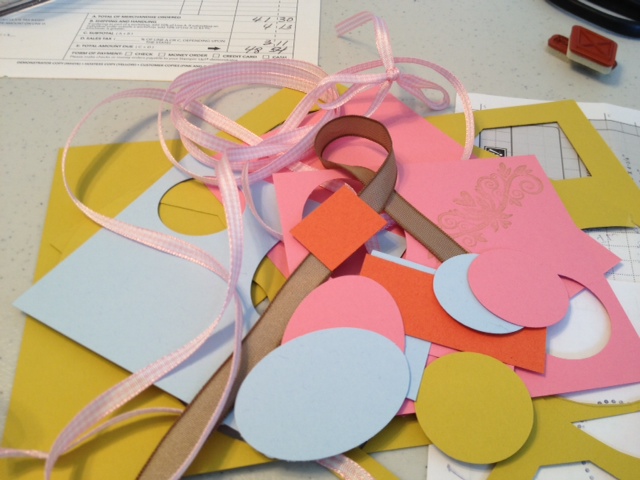
This one also uses the honeycomb background.  The Wild Wasabi is the remainder of the piece of Wild Wasabi with the vine embossing.   I tied around the scrap of Soft Suede ribbon and mounted that on a piece of Soft Suede card stock and then put it all on a Whisper White card.   I tried adding circles and ovals of the other colors but just did not look right.  At one point the ovals on the green might have made a cute Easter card but I did not want to go that direction.  So I just added the simple Hello stamp from the Tiny Tags set and said "Done!"   I like it and it is such a simple design I  will probably make more  :-)


Number 3 uses the Top Note die.  I adhered it to a piece of Regal Rose so that it hung off the edge - then trimmed it flush.   The swirly stamp is from a retired set but any decorative stamp would do.   The Certainly Celery satin ribbon is accented with a piece of Pretty in Pink gingham ribbon that I found on the clearance rack a couple years ago.  I hate to see Pretty in Pink leaving since I use it a lot for baby girls (and have that new granddaughter !) I'm sure I will find alternates.  I used the birthday sentiment from Petite Pairs ......


and stamped the other half of it inside with another one of the decorative swirls.  I think this is the favorite of the 3 scrappy cards I made.

So here is what I did with my scraps.......

or at least some of them.  This is what I had left after making those 3 cards (see the ovals and circles that I tried to use on card #2)   Saving those for another day :-)

And speaking of the new granddaughter - meet Adelyn Kaylee --


here she is 4 days old and visiting Grandma and Grandpa at work.  We just love her!

Saturday, April 6, 2013

Craft Therapy

Finally took some time today for some craft therapy and trying the telescoping card is just what I needed.   I have wanted to try those for some time.  Today was the day!


This is the first one I made.   I used the circle and scalloped circle dies for the Big Shot.  


The card opened.  I did not intend for the larger circle to be on top but it worked out okay.  Then I realized one of the scallop circle dies is no longer available through Stampin Up so needed to come up with something else for the club next week.

So then I designed this rectangle version.  I added a little to it by embossing the Baja Breeze sky with the Cloudy Day embossing folder.  This one can be made without any special punches or dies. 

Here it is opened.  I thought the sentiment ":The sky's the limit" would make this a nice graduation card.